Friday, February 26, 2010

My First Giveaway! - The Beauty Blender


I started my blog Jan 1 2010, and since then I have been amazed at the amount of support and encouragement that I receive from readers each and every day. You all are truly amazing, and I have met some really cool people along the way!

Yesterday I reached 100 followers, so I thought it only fitting to commemorate the support by offering a giveaway!

Weapon numero uno in my makeup kit is my Beauty Blender! Like I said in my last makeup tut, I get an airbrushed, natural, dewy look when I use it to apply my foundation. I am so pleased with the BB, I decided to offer it in my first giveaway. One lucky reader will receive her very own Beauty Blender [new of course] to add to her styling arsenal!

So here's the skinny; Leave a simple comment on what your definition of true beauty is, and I will use a random number generator to pick a winner [you must be a subscriber though]!

On Monday, I will announce a winner! Simple enough eh? I definitely forecast more giveaways in my future :-)

Thursday, February 25, 2010

Interview with Jane Carter of The Jane Carter Solution

Recently I had the pleasure of interviewing Jane Carter, creator of the Jane Carter Solution. Jane's down to earth demeanor was like a breath of fresh air in this superficial industry; and her extensive knowledge of hair, and product formulation was impressive to say the least. Jane definitely knows her stuff, as she is a veteran stylist who immersed herself in numerous formulation chemistry classes, and stands by her philosophy that we shouldn't over complicate hair care.

Wednesday, February 24, 2010

5 Minute Face - The Pictorial


I Used:
MAC Primer
Makeup Forever Face & Body Makeup in color 44
MAC Eyebrow Pencil in Spiked
Benefit Brow Zing [Powder] in Medium
Benefit Bad Gal Mascara
MAC Loverush Blush
Nars Giza Lipgloss

Apply primer to face, I use a foundation brush to ensure even coverage
Apply liquid foundation - I use the Beauty Blender, it gives a dewy, airbrushed look!
Just stipple the foundation on using the larger portion of the beauty blender.
With light strokes, draw a line underneath your brow following your natural arch. I normally go a bit darker at night.
Fill in brows with eyebrow powder
Now add two coats of mascara to top and bottom lashes
I add blush to the middle part of my cheeks first
I also add blush to the "apples" of my cheeks
Add gloss, and you are good to go!

Tuesday, February 23, 2010

A Few of My Pieces


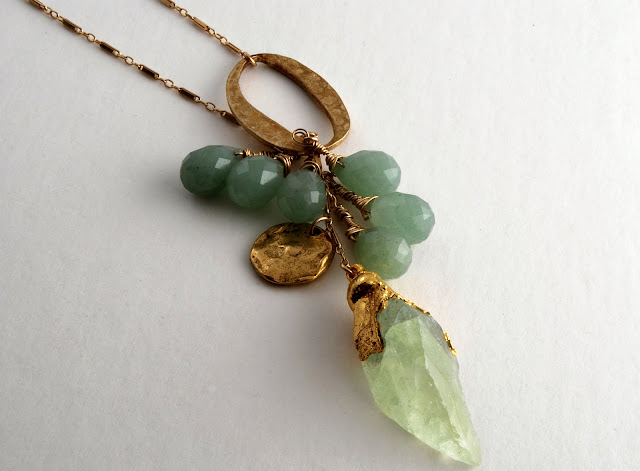
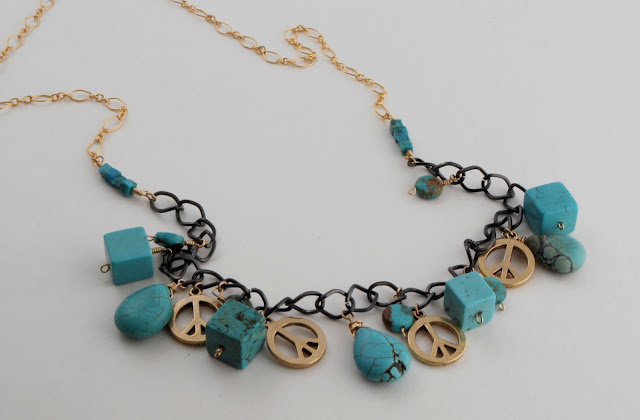
I received a few emails & comments from some of my readers inquiring about my profession. I am a Jewelry Designer based in Los Angeles, and do mostly custom work. Last week, I promised some of you that I would post a few pieces; well here they are! All jewelry is handmade by me using 14K gold materials, and semi precious stones! I hope you enjoy :-)

DIY Statement Bib Necklace | The most potent muse of all is our own inner child – Stephen Nachmanovitch

These necklaces are everywhere! I decided to try my hand at one last night, and was pleased at how it turned out. - You can really substitute a lot of these materials if you like! Be creative, as the possibilities are endless!


Gather your materials! You will need:
Scissors
Pins
Trim
Satin Cord
One Scrap Piece of Fabric - Front
Contrast Scrap Piece of Fabric - Back
2 Connector Pieces
Beads [Optional]
Applique's
Fray Check
Fusible Webbing [For attaching trim]
Sewing Machine - [Or needle & thread for hand sewing]

Start off by sketching your pattern onto a piece of paper - Sketch one side only
Fold paper in half, then cut out online outside. You should get a mirror image of the pattern.
Cut out the pattern
Take the two pieces of material and pin them RIGHT SIDE TOGETHER. Then pin the pattern on top. Once pinned, cut out pattern.

Machine sew material together [you can also hand sew]. Leave a 2 inch space in ONE corner. We will use this space to aid in turning the material inside out.

Here is my piece of fabric prior to turning it inside out.

Turn the fabric inside out, then press with an iron! Then hand sew the section that you left open.

This is a view of the back
Slide connector over piece of fabric
Use fusible webbing to secure the flap of material over the connector. [This is the point you will need your iron. Hold the iron over the area with the fusible web for about 20 seconds]

Turn piece over, and apply fusible webbing along end of piece. Place the trim on top. Iron.

This is what it should look like after attaching trim!
I decided to add a few beaded applique's instead of beads. I attached these using fusible webbing as well.

Take two pieces of satin cord and knot each piece around a connector. Trim excess cord around knot, use "fray check" to keep cord from fraying [you can also use super glue]


Make a knot [I added a bead for more of a decorative effect] on one end of the cord. On the other piece of the cord, make a loop. Trim excess cord, use "fray check" or super glue to keep cord from fraying.

Monday, February 22, 2010

Sometimes Less is More - My Best Braid Out to Date

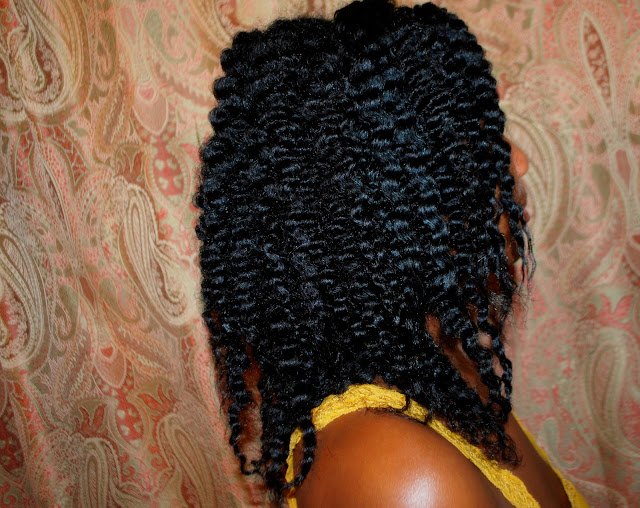
Today I attempted another braid out, and I must say I was quite pleased with the results. By using less products this time around, I was able to achieve hair that had a lot more sheen, body, and softness.
Here's what I did to get this look:
Clarified with L'anza Daily Clarifying Shampoo followed by Keracare Hydrating Detangling Shampoo
Conditioned with L'anza Nourishing Conditioner
Used Paul Mitchell The Conditioner [Leave-In]
Braided hair using Miss Jessie's Curly Pudding
Spritzed Oyin Handmade Juices & Berries on my hair after I finished all of the braids

This is the size of the braids, it generally takes me about 45 minutes to braid my entire head - I allowed my hair to dry for 6-8 hours prior to taking down the braids. To aid in the takedown process, I used a smidgen Afroveda Citrus Sunsilk Hair Oil.
This is what my hair looks like after I take the braids down. I haven't separated the "crinkles" at this point.
Another view of hair before separating
 Here's my hair after fluffing, and separating. As you can see, I have a lot more volume.
Related Posts with Thumbnails