Showing posts with label All About Hair. Show all posts

Monday, December 27, 2010

2011 Haircare Challenge: Simple Effective Ayurvedic Elements For Regimen Building

 [source]

This post is for those that are interested in going the Ayurvedic route for the 2011 Healthy Hair challenge. - Ayurvedic regimens typically include cleansing the hair with herbal infusions, and conditioning the hair with nourishing oils. The result is hair that is extremely healthy, thick, and full of body. Ayurvedic regimens can be as simple [incorporating a few elements], or as complex [following a strict regimen, cutting out commercial products] as you choose. 

The benefit of adhering to an exclusive Ayurvedic regimen is that you will be using products free of silicones, preservatives, synthetic ingredients and harsh sulfates. I can honestly say that my hair thrived under these conditions. The drawback to practicing an exclusive Ayurvedic regimen is the amount of time it takes to prepare treatments. However, you can also decide to incorporate highly effective elements of Ayurveda into your regimen, such as Henna treatments, Coconut pre-shampoo conditioning treatments, and herbal pre-shampoo conditioning treatments. These inclusions are extremely beneficial for the promotion of healthy, thick, vibrant hair; yet require less time commitment than an exclusive Ayurvedic regimen. 

Want to include simple elements of Ayurveda without committing to an entire Ayurvedic regimen?
While there are many ways to use the products mentioned in this post, the following products are Ayurvedic treatments that have been the most effective during my hair journey. These products also include numerous traditional Ayurvedic herbs which is a plus for those that aren't into complex hair regimens which requires the purchase of tons of different ingredients. Get the benefit of Ayurvedic herbs with only a few easy to find products.
You will need:
Vatika Oil: Vatika Oil is comprised of Coconut Oil and infused with traditional Ayurvedic Herbs [Brahmi, Neem & Amla just to name a few] Coconut Oil strengthens hair at the roots, promotes hair growth, and actually penetrates the shaft to repair areas of the hair damaged from protein loss. - Vatika Oil has been a staple in my home for the past two years! It makes my hair extremely soft, shiny, and manageable.

Kalpi Tone: Kalpi Tone works to strengthen hair at the root, strengthen the hair shaft, and promote hair growth. Kalpi Tone leaves your hair noticeably stronger, softer, and full of body. Those that wish to keep their regimen simple will also appreciate that this powder includes other herbs beneficial to hair care [like amla, maka, hibiscus, and methi just to name a few]. Kalpi Tone is hands down one of my favorite pre-packaged herbal hair products by Hesh.

Henna: Think of Henna like a natural protein treatment. Henna works to stop breakage by strengthening the hair shaft. Henna also works to seal and repair the cuticle which makes for more manageable hair, a plus when it comes to detangling. Although Henna is mainly known as a mega strengthener, Henna has conditioning properties as well, which leaves the hair shiny, soft and full of body.

How to use these products in your regimen: 
You may notice there are two pre-shampoo conditioning formulas here. You can stick to one, or alternate weekly.  
Vatika Oil/Pre Shampoo Treatment: Once weekly [on washday], oil unwashed hair liberally with Coconut Oil and cover hair with a plastic cap for about 45min-1hr. This is known as a pre-shampoo conditioning treatment. Pre-shampooing will help ensure the hair stays moisturized even after shampooing with a product that contains sulfates [which is usually drying to hair]. Another benefit to this quick and easy pre-shampoo treatment is that it also works to strengthen and nourish hair follicles; preventing hair fall and promoting hair growth. 
*Coconut Oil tends to solidify in cooler climates; to use just run the bottle under warm water to bring it back to a liquid consistency. 
**Vatika Oil is safe to use on relaxed and transitioning hair alike.

Lock in the moisture with Vatika Oil: You can use this oil to seal the moisture in after using your favorite moisturizer. Add a dime size amount of oil to your hands, rub hands together to distribute oil, then apply to the entire length of the hair paying special attention to the tips/ends.

Kalpi Tone/Herbal Pre Conditioning Treatment: Once weekly [on washday], add 3-4 tablespoons of the herbal product into a clean container. Add water, 1 tablespoon at a time until the mixture is a thick, muddy consistency. Apply the mixture liberally [as you would a relaxer] to unwashed hair. Cover, and allow to sit for 20-30 minutes. To rinse out, add a few generous size dollops of cheap conditioner [like V05, or Suave] to your hair and work it through in a gentle, massaging motion. Rinse immediately, as the tiny flecks of herbal product should rinse clean with the aid of the conditioner.
*Kalpi Tone is safe to use on relaxed and transitioning hair alike. 

Henna Treatment: You will need the following:
200G Henna [two boxes for thick hair] [100G/one box for shorter length hair]
1/2 cup Hello Hydration Conditioner
1 cup Lustrasilk Mango & Shea Butter Conditioner
1/2 cup of Coconut Oil added to mixture before applying the Henna
Check out this video for info on how to mix and apply Henna

I recommend the following brands of Henna: Jamila, Nupur, and Dulhan. If you have relaxed or transitioning hair, please use Body Art Quality Henna only [like Jamila]. You can also purchase Henna at your local Indian Grocer, or {here}.

Are you interested in an exclusive Ayurvedic hair regimen?
Check out the following posts which includes recipes for cleansing, conditioning, and moisturizing your hair. 

Where to find the products mentioned in this post:
All products mentioned above can be found in your local Indian market. I recommend going to one of the larger markets for a better variety of products. If you are having trouble finding an Indian grocery store in your area, you can also purchase many of the products mentioned via vendors on Amazon or The Indian Food Store [link].  


Questions are always encouraged! You can leave a comment in the comment area [I will check comments nightly], and also ask questions during the two check-ins I will have monthly.

Follow MTM on Twitter | Add MTM on Bloglovin'Like MTM on Facebook 

2011 Healthy Hair Care Challenge: Framework For Your Healthy Hair Regimen

 [Source]

To get the best results from this challenge, you have to first devise an effective plan of action. An effective hair regimen will ensure you prevent setbacks, and also see to it that you reach your goals on time. When choosing a regimen, it is best to take into consideration your schedule, and the amount of time you wish to commit on maintaining your hair on a weekly basis. Being honest with yourself about the amount of time you wish to spend on your hair can help prevent burnout, and resentment [trust, I have experienced this many times throughout the past few years]. It doesn't matter if you have a complicated regimen, or one that is very simple. The key to getting the most out of your healthy hair regimen is consistency. 

This framework is geared to those who will be wearing their hair in it's natural state in either twist outs, braid outs, or afro's. We will discuss product recommendations,  as we move through various regimens this week. For now, I want to get everyone acquainted with the fundamentals of a healthy regimen. These elements should be included in everyone's regimen no matter if you are choosing to go the Ayurvedic, Natural or Traditional route.   

Your regimen should include the following:

Detangling prior to wetting hair: This is essential in reducing the amount of hair lost, and more importantly increasing the amount of length retained. Detangling prior to wetting the hair is easier on the hair shaft [as hair is in it's most fragile state when wet], which means no more splits, knots and breakage from detangling. Always detangle with a seamless wide-tooth comb. If you're on a budget, you can pick up the Jilbere shower comb which is a favorite of mine. They retail for under $2 at Sally's

Pre-Shampoo conditioning treatment: Sulfates in shampoos, and synthetic ingredients found in many hair care products can really take a toll on highly textured hair, leaving it brittle, dry, and lifeless. Pre-conditioning involves conditioning the hair prior to shampooing it. What this does is re-hydrate thirsty hair, helping it to retain more moisture after shampooing, and throughout the styling process. 

Shampoo hair in sections: It may take an additional 5-10 minutes, but you will definitely appreciate the benefits. Shampooing hair in sections ensures you get your scalp clean, and keeps your hair neat which prevents knots, matting and excessive tangles. 

Deep Condition: Deep conditioning the hair weekly prevents breakage from dryness, corrects issues with elasticity, nourishes the hair follicles and promotes hair growth. Keeping highly textured hair moisturized is key for maintaining, thick, healthy hair. - You can choose to deep condition with heat [using one of those inexpensive soft bonnet dryers], or by using your own body heat generated from your scalp [just cover your head with a plastic cap].

Moisturize your hair: Replenishing moisture levels throughout the week makes for happy, healthy, soft, touchable, manageable hair throughout the entire week. Often, when hair is stiff, brittle, or excessively dry before weeks end, it is due to the lack of moisture. - Keeping hair moisturized also helps prevent breakage from dryness and keeps your strands lubricated which helps keep the tips of your strands from forming knots/tangles. 

Seal in the moisture: Beat moisture loss by sealing in the moisture after hydrating your hair. To lock the moisture in your hair, add a dime size amount of oil to your hands, rub hands together to distribute oil, then apply to the entire length of the hair paying special attention to the tips/ends. 

Sleep in a stain bonnet or on a satin pillowcase: Cotton is not your friend. In fact cotton can cause split ends, breakage, and chronic dryness. Avoid setbacks by sleeping in a satin bonnet, or on a satin pillowcase. Your hair will thank you!

Every month consider the following:
Scalp Treatments: Scalp treatments are effective in removing bacteria and exfoliating dead skin cells [accumulation of dead skin cells and bacteria can lead to hair loss/thinning]!
Every six to eight weeks consider the following:
Protein Treatments: Protein treatments work to keep your hair healthy and strong by preventing or correcting breakage, filling in gaps along the hair shaft [which helps your hair retain more moisture] and correcting issues with elasticity.

For those that plan on wearing their hair "out" in it's natural state [like twist outs or braid outs], I recommend shampooing and deep conditioning once weekly. Use this sample regimen as a starting point when making your own:
  • Sunday: Detangle hair + Condition hair with a pre-shampoo treatment + Shampoo Hair + Deep Condition + Lightly detangle + Style

  • Monday:

  • Tuesday: Moisturize hair as needed + Seal in the moisture + Re-twist/Re-braid hair as needed

  • Wedensday:

  • Thursday: Moisturize hair as needed + Seal in the moisture + Re-twist/Re-braid hair as needed

  • Friday:

  • Saturday: Moisturize hair as needed + Seal in the moisture + Re-twist/Re-braid hair as needed
The regimen listed is the framework for length retention, thickness, and body. As I discuss various regimens, I will go into depth on scalp treatments, pre shampoo treatments, protein treatments, oils to seal in moisture, etc.

EDIT: Many of you are inquiring about protective styling options/regimens. A sample regimen will be posted this week with product recommendations, styling options, etc. The regimen I posted today is specifically for the people that choose to wear their hair out the duration of the challenge. - Many people ask my thoughts on "protective styling" versus wearing your hair out. I have done both, and from personal experience have retained the same amount of length doing it either way. The key to retaining length for me has been moisturizing, careful detangling, and alleviating stress placed on my follicles. 

Questions are always encouraged! You can leave a comment in the comment area [I will check comments nightly], and also ask questions during the two check-ins I will have monthly.

Follow MTM on Twitter | Add MTM on Bloglovin'Like MTM on Facebook 

2011 Healthy Hair Challenge: Today's Schedule

 [source]

Throughout the week, I will cover information on various regimens [Ayurvedic, Traditional, Natural, DIY], product recommendations, and techniques. In efforts to make it easier for people to effectively navigate and apply the information, I decided to break everything up into chunks. Here's what is covered today:

Monday: 
Regimen Building: Includes information on what the basic regimen for women/men wearing their natural hair in a free flowing style should consist of [regimens for those that are heat straightened, relaxed or braided/twisted regimens will also follow this week]. This outline will demonstrate the basic regimen without a specific focus on Traditional, Ayurvedic, or Natural. Regardless of the type of products you choose, your regimen should include the basic concepts outlined in the post, as it is geared to maximize length retention, and prevent breakage/split ends/knotting/matting. 
To view the post, click {here}

Regimen Building: This installment will focus on the Ayurvedic methods of caring for your hair. In this post, I talk about simple Ayurvedic methods you can incorporate into your hair care regimen, the benefits, and list detailed product recommendations. 
To view the post, click {here}


Follow MTM on Twitter | Add MTM on Bloglovin' Like MTM on Facebook 

Thursday, December 23, 2010

Healthy Hair In 2011 Challenge! Session #1 Who's In?

 [source]

Whether your goal is "bra strap" length hair, or growing out your TWA, join me for the healthy hair in 2011 challenge! No matter the state of your hair, you can turn it around by practicing healthy hair care techniques and keeping an air tight regimen [which sounds harder than it actually is]. Healthy hair isn't limited to just wearing your hair in a natural state. You can have healthy heat straightened hair and healthy relaxed as well. The key is to do everything in moderation. 

In order to get the best results, it's best to start your personal hair care challenge with a trim. If your ends are in good condition you can skip this step. Trimming your hair is essential to retaining length. Here's why; ends that are split will eventually break off, and you will gradually lose length this way. Couple healthy ends and care when handling your hair and you will be able to retain that 1/2 inch of growth monthly. 

There are many ways you can care for your hair during this challenge. You can go with a traditional regimen using some of your favorite products, you can opt for all natural products, and you can even take the Ayurvedic route. No matter which regimen you choose, the things you must remember are:
  • Proper Detangling Techniques
  • Keep the stress low on the hair follicles [avoid tight buns, pony's and tight braids]:
  • Keep your hair moisturized 
  • Lay off the excessive heat: Excessive heat breaks down the Keratin bonds in your hair which could cause breakage and overly porous hair [overly porous hair does not retain moisture well]
  • Monitor temperatures if you use heat: Always make sure you are using the appropriate heat setting for your hair type.
  • Go easy on the products that contain alcohol [gels, setting lotions, hair spray]: These products can dry out your hair leaving it brittle, the ends split, and your strands lacking moisture. 
  • Keep your hair protected at night: Sleep with the use of a satin bonnet, or on a satin pillowcase, not only will this help protect your strands from breakage, but it will also help stretch the life of your hair style. 
  • Deep conditioning regularly: Hair that is highly textured needs regular conditioning intervals to help replenish lost moisture and nutrients to keep it healthy and promote hair growth.
Keeping these basic principles in mind will foster healthy hair and also keep you motivated as you start to see the health of your hair improve and also start to notice growth. Some essential tools you need on your journey are: 
  • Wide tooth comb: For detangling
  • Soft/hard bonnet dryer: For deep conditioning
  • Conditioner
  • Ouchless rubberbands
  • Moisturizing Shampoo
  • Clarifying/Chelating Shampoo
  • Natural Oil: For sealing moisture in your hair, I recommend Grapeseed, Jojoba or Coconut.
  • Styling aid: For doing styles like twist outs or braid outs. You can use hair butters like Bee Mine Bee Hold Curly Butter, or puddings like Miss Jessie's
How the challenge works: The first session of this challenge will last for six months. Every month I will hold two virtual check-ins where I create a post geared towards answering questions, concerns, and talking about products. One check in will be via LiveStream, so that I can answer your questions real time, and the other check in will be via blog post for those that are unable to log on to get their questions answered. 
---
The goal is to create a community that encourages women to start taking better care of their hair, and get questions answered about products, setbacks, general self esteem issues, and regimens so that they feel good about themselves and their journey. 
---
The healthy hair care challenge is open to anyone who wants to ring in the New Year with a healthier approach to hair care. It doesn't matter if you are relaxed, natural, transitioning, or heat straightened.  
---
To participate in the challenge, please list your starting length and your goal length [in the comment section]. Please also list the type of regimen your going to follow. Choose from Traditional [using regular products/methods], Natural [consisting mostly of DIY and natural products] or Ayurvedic [consisting mostly of Ayurvedic Herbs/Oils]. Starting Monday, December 27th, I will list product recommendations and sample regimens for each category. 
---

To kick it off, my starting length is mid back length, my goal is waist-length, and I will maintain a regimen that is a combination of traditional, natural, and Ayurvedic!
---
The challenge will start Jan 1rst, and will run for six months! If you're looking to turn your hair around and you don't know where to start, or you're lost in your hair journey, or simply want a little motivation, let's go!
--
If you would like to be notified of the check-in dates ahead of time, and receive a newsletter [one newsletter will go out once monthly and will cover a range of topics from protective styling options, to product recommendations, DIY hair care recipes etc], please send an email with "Subscribe" in the subject line to: mtmhealthyhairchallenge@gmail.com

Follow MTM on Twitter | Add MTM on Bloglovin'Like MTM on Facebook 
Tuesday, December 21, 2010

Hair Update!

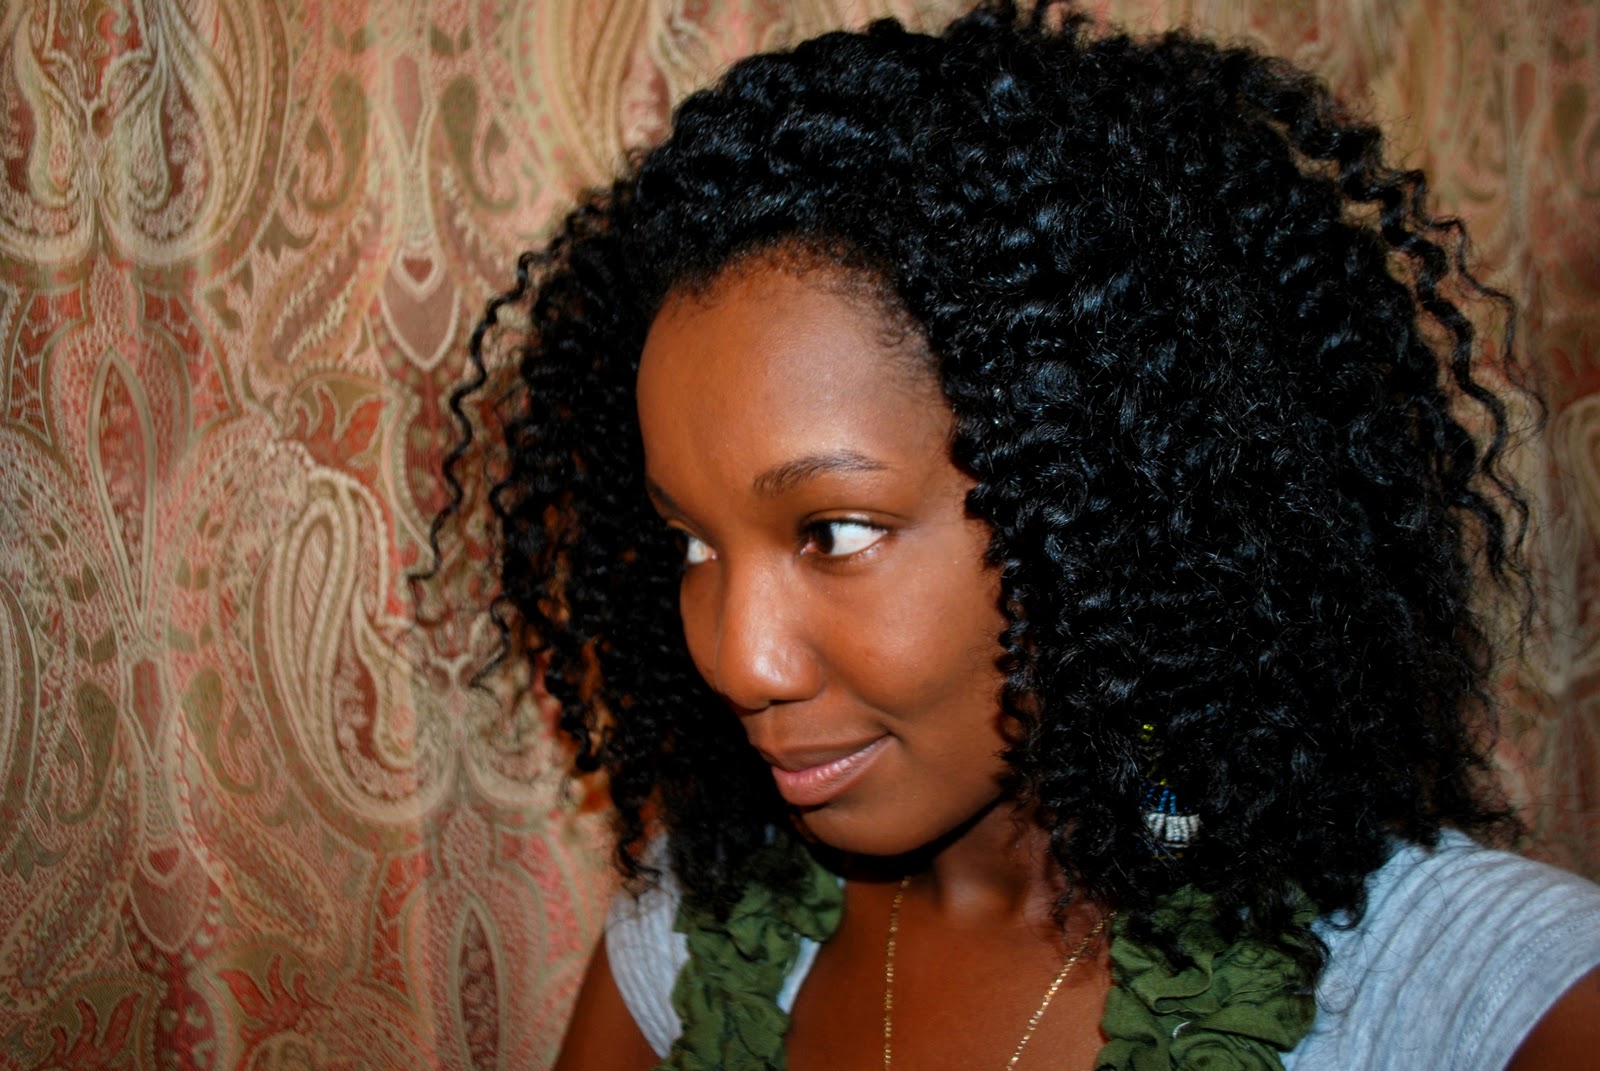
 Forgive the pic quality, it's super cloudy outside. 
Here's a shot of my bangs
 3.25 inches until I am waist length which is my final goal

Last week I had to straighten and trim my hair for a shoot. While it was fun to go straight for a change, I didn't really have time to document the way I detangled, blow-dried, trimmed, or pressed my hair [which I will do in the next few weeks]. A lot of people ask me why I trim so much each time I straighten; the reason is that I started my hair journey with a ton of heat damage, and instead of cutting it all off at one time, I cut it gradually. After this final trim, I think I got rid of all the straight ends.

This is the longest my hair has been in my entire life, and I definitely attribute it to limiting the amount of heat used on my hair, and all of the methods/tips/techniques I share on this site. In 2011 I hope to reach my final goal of waist-length. Here's a recap of my hair journey over the past two years. 
My healthy hair journey started December 2008 with this as my starting picture. As you can see, my hair was barely APL [arm pit length]. My hair at this point was very damaged. The front was breaking off [which is why it appeared layered], I had major breakage around the hairline, and nape area as well. My hair was also very thin due to excessive heat. 
These were my braid outs in the very beginning [the first few months December 08-March 09]. I always wore them pinned back because my hair was too thin to wear it full. It always appeared sparse and "piece-y" so I just pinned the sides back. I had about 4-5 inches of heat damaged ends, so my ends were super straight. I had to put rollers on the ends of my braids just to get a slight curl. 
 During this time I maintained a strict Ayurvedic hair regimen
These were my twist outs in August of 09. I was still wearing the sides pinned because my sides were still very short.
At that time, Deva Curl products were my fave. Set it Free made my hair very shiny.
In September of 2009, I decided to straighten it for Labor Day. My hair is styled in a Caruso Roller Set here. 
I trimmed my hair in October 0f 2009 to get rid of about 2 inches of heat damaged hair I was holding on to - I am almost Bra Strap Length here
 After trimming those heat damaged ends, I really experienced a growth spurt; this is my hair in Jan 0f 2010 styled in a twist out
 My hair in June 2010 after trimming another few inches to remove the heat damaged ends I started with. I am slightly past Bra Strap Length here.
In June of 2009, I did another Caruso Roller Set
At the end of July 2010, I decided to cut my bangs for a different look. My hair is styled in a twist out here.
My twist out in August 2010
 In November 2010 I started experimenting with dry twist outs..


Follow MTM on Twitter | Add MTM on Bloglovin'Like MTM on Facebook 

Thursday, December 16, 2010

Update On Lo's Hair!! + How To Get Your Stylist To Take Better Care Of Your Hair!

Many of you may remember my partner in crime Lo! And those that may not know her by name may remember seeing her thick, black, curly mane on my blog! After almost two years of not pressing her hair, Lo decided to pay a trip to a stylist to get her hair done a few weeks ago to change up her mojo!
Almost two years ago, she big chopped and rocked a tiny TWA under wigs until she started wearing her hair in twist-outs as pictured above.
A few weeks ago, she decided to go straight for the winter!
Over dinner, we discussed how difficult it is finding a stylist that not only caters to natural hair, but also specializes in healthy hair care. Many stylists are thoroughly trained on how to properly execute a style to satisfy their patrons, but often techniques like blow-drying, pressing, and the use of styling aids are done without the health of your hair in mind. - It is for this reason that it is important to not only monitor the habits of your stylist, but talk to them about your goals, expectations, and hair regimen before going through with the service. 
Here are some important things to look out for and discuss when choosing a stylist:
Does your stylist "scratch" or "massage" your scalp when shampooing: Scratching the hair can weaken the bond between the hair and follicle which could later lead to hair loss. Massaging or rubbing the scalp is a healthier, more effective alternative. 
Bring your own products: If you notice your hair is drier than usual, or your scalp is dry and flaky after a service, it could be from your stylists shampoo or conditioner; opt instead to bring your own. 
Pack your own microfiber towel:  Cotton terry towels can wreak havoc on all hair types and textures, so it is important to use a microfiber towel when towel drying your hair. Microfiber towels absorb more moisture and also help cut down on frizz, eliminate split ends and damaged follicles [from towel drying]. If your salon doesn't carry microfiber towels, bring one with you!

Towel dry thoroughly: Towel drying thoroughly means less time spent blow-drying. Less time blow drying means less heat which equals happy hair. Make sure your stylist gently squeezes your hair with a towel versus rubbing hair; as rubbing can cause split ends, breakage and follicular damage.

Avoid mechanical damage: You can avoid split ends, single strand knots, breakage, and eliminate fly-aways by speaking to your stylist about the manner in which they detangle your hair. Don't be afraid to speak up, it's your hair, and you are paying for the service. Be leery of a stylist that isn't attentive to your needs. Remember to express the following to your stylist:
  • Hair should be detangled in small sections using a wide tooth, seamless comb [bring your own if you have to] 
  • Hair should never be detangled while it is soaking wet, as that is when your hair is in it's most fragile state. Instead make sure hair is towel dried thoroughly. 
  • Stylist should lubricate hair with either a light leave-in or serum to help the comb better glide through the hair. 
  • Stylist should hold the hair closest to the roots whilst detangling to help reduce the amount of tension placed on the follicles.  
  • Hair should always be detangled from the bottom up.
Proper blow drying techniques: Highly textured, kinky hair should never be blow-dried on high heat. However many stylist may choose to do so to get the hair as straight as possible prior to pressing. While it may make the hair easier to manipulate when pressing, it can dry the hair out, and make the hair overly porous. Overly porous hair will have a hard time retaining moisture, and breakage/split ends can occur. - Also keep an eye out for how close the blow-dryer is to your scalp/hair; a healthy distance is between 6-8 inches. If you notice your scalp is tight, flaky and dry after blow-drying, the stylist either had the blow dryer too close, too hot, or a combination of both. 

Go easy on the spritz's and serums: Yes hair spray may help keep every hair in place, but they can also be very drying on the hair due to the alcohol content. Spraying each section of hair before pressing or curling it with hair spray that contains alcohol can be a recipe for disaster [breakage, split ends]. Excessive use of serums can also shorten the time span of your hairstyle. Hair that is weighed down with serums gets stiffer and dirtier quicker than hair with minimal product. - If you want to minimize the amount of time you see a stylist monthly, make sure to talk to them about going easy on the styling aids. 

Heat control: This is a biggie. How much heat is your stylist using? Unfortunately it is impossible to know how hot the pressing comb is before the stylist presses your hair. You can however take note of these signs that may indicate the incorrect temperature: 
  • You start to notice areas of hair that don't revert, or the ends of your hair may appear straight when your hair is wet. 
  • You start to notice thinning, usually it appears first around the area that frames your face [bangs, and sides of your hair]
  • Hair may also be dry and brittle to the touch [keep in mind that brittle hair can also be a result of improper blow drying techniques, and the excessive use of styling aids containing alcohol.
Make sure the pressing combs are cleaned regularly: Pressing combs that are cleaned thoroughly give you a straighter, sleeker press, and are actually less damaging than combs that are loaded with buildup. If you notice your hair has a weird smell after a service, chances are the combs were not cleaned prior to using them [I typically clean my combs after each use, which completely eliminates that "pressed hair smell"].


    Follow MTM on Twitter | Add MTM on Bloglovin'Like MTM on Facebook 

    Thursday, December 9, 2010

    Products + Techniques That Help Prevent Shrinkage

     [source]

    Depending on how tightly wound your coils are, your hair could shrink up between 50-80% of it's actual length when wearing it in natural styles. Check out these pictures to see how different my hair looks with different products & techniques!
    Twist out done on slightly damp hair yields more of a longer, fuller twist out
    Twist out on fully dry hair gave me more of a somewhat silky, wavier look
    Regular twist out using Miss Jessie's Curly Pudding + Jane Carter Hold Spray
    Twist out using Shea Moisture Curl Enhancing Smoothie 
     Twist out using Eco Styler Gel

    As you can see, you can achieve various degrees of length based on your techniques and product selection. Here are my recommendations for keeping as much length as possible!

    Techniques:  
    Try one or a combination of these techniques to help prevent shrinkage!

    Shampoo hair in braids: Not only does this help prevent tangles, and make styling a breeze, it also helps prevent shrinkage because your coils are kept in an elongated state while cleansing. 

    For thicker twists, clip roots with metal duckbill clips: Thicker twists tend to give more fullness, but you run the risk of extreme shrinkage because there isn't enough tension on your roots to keep them from shrinking.  For those days you are craving big hair, secure the roots of your twists with metal duckbill clips to keep the roots from shrinking.

    For thinner twists, clip ends with metal duckbill clips: Thinner twists may yield more definition overall, but they can also cause shrinkage as well. Secure the ends of each twist with a metal clip or roller to help elongate the twist as it dries. The result should be hair that is longer with more definition.

    Braid hair into four cornrows and allow to air-dry until slightly damp: If you have extremely springy, coily, hair; it may be necessary to up the ante and air-dry your hair before styling. For best results, cornrow the hair because it applies the necessary amount of tension that ensures your retains as much length as possible as it dries. {be careful not to apply too much tension on your scalp} - Once the hair is slightly damp, take down the cornrows, and twist or braid the hair as usual.

    Dry hair in large bantu knots: Drying hair in large bantu knots is perfect for those that are challenged in the cornrowing department, as all it requires is a bit of twisting. Drying hair in bantu knots yields the same benefits of cornrowing, only it leaves your hair curly instead of crinkly.

    Twist/Braid hair, then sit under a hooded dryer for 40-60 minutes: You can always twist or braid hair per your usual styling routine, place metal duckbill clips on the ends of each twist and sit under the dryer. The metal clips will help keep your hair elongated while your hair dries. Using heat also helps your hair dry before it has a chance to shrink completely. - For the health of your ends, please use end papers in between your clips and your hair if you decide to use this method as the metal tends to get warm. - End papers and metal clips can be found in most beauty supply stores near the color isle.

    If you always experience an enormous amount of shrinkage, opt for braid outs instead of twist outs: Braid outs yields more length because of the amount of tension applied on your hair as it is braided. Because of this tension, your hair does not shrink much as it dries.

    Product Recommendations For Wet Twisting/Braiding:  
    While there are many products out there that do a wonderful job at moisturizing hair, providing great hold and definition, I have found these the best at curl elongation. 

    Aloe Vera Gel: Add a few heaping dollops of Aloe Vera to your favorite product to increase its curl elongating benefits. Not only does adding Aloe Gel stretch the amount of product, but it adds moisturizing benefits as well.

    Eco Styler Gel: This has easily been one of my favorite products of the year because of it's versatility [I can use it for twist outs, wash and go's and sleek buns], and because of how well it elongates my curls. I use this primarily for twist outs, and it gives me definition and more length versus any other curl cream I have tried to date. 

    Miss Jessie's Curly Pudding: This is one of the first curl creams I have tried, and one I always go back to when I'm in a pinch and need something quick and effective. Curly Pudding gives me great curl definition [when used as a creme to twist hair], and also helps out a bit in the elongation department.

    Product Recommendations For Dry Twisting/Braiding:
    Karen's Body Beautiful Sweet Ambrosia {formally known as hair milk}: I used this in the first picture on damp hair and it was amazing. It hydrated my hair without causing it to revert, and it provided some hold and protection against the chilly NY weather I was in. I have been experimenting with many products to use for "dry-damp twist outs" but this is definitely the winner.

    Herbal Essence Long Term Relationship Leave-In: Another one of my favorites, this moisturizes my hair without causing it to revert, and makes a nice product to twist dry/damp hair with.

    What do you do to beat shrinkage?


    Follow MTM on Twitter | Add MTM on Bloglovin'Like MTM on Facebook 

    Wednesday, December 8, 2010

    Reader Question: Will My Hair Still Grow If I Wear It Pressed Instead of Natural?

    In the most literal sense, your hair will grow regardless of what style you wear it in. The key to achieving your length goals lie in how well you are able to retain the hair that grows. Some of the major factors that prohibit length retention when wearing your hair straight are:
    - Excess heat from pressing combs, blow dryers, and curling irons
    - Breakage from detangling
    - Breakage/split ends from combing/brushing while blow-drying
    - Dryness from styling products that contain alcohol [setting lotions, hair spray] 
    - Breakage from wrapping hair the same way daily
    Hair grows at about an average of 1/2 a month. With proper care, you can retain that 1/2 monthly which means you will see significant growth in as little as 6 months. To retain that 1/2 inch a month, keep the following tips in mind:
    - Try to use heat no more than twice monthly 
    - If you are relaxed or transitioning, I recommend skipping the blow dryer. Instead wrap wet hair and sit under a hooded dryer, as it is less damaging to your hair. 
    - If you must use more than two heat tools [for instance a pressing comb and a flat iron, or pressing comb and a curling iron] in one styling session, opt to air-dry the hair instead of blow-dry. The less heat your strands have to endure, the better off they will be.  
    - If you decide to blow dry, make sure you detangle your hair with a wide tooth comb, then go through the hair once more with a blow-drying comb. This can eliminate damage from pulling and tugging on kinks and knots when blow drying. Remember the wide tooth comb gets out larger size knots, however a smaller tooth comb [passed through the hair after using a large tooth comb first] will remove smaller kinks and coils that can make blow drying a pain.  
    - Always deep condition with heat after every shampoo, this will help replenish moisture, correct issues with loss of elasticity, and nourish the hair follicles. The nutrients in your deep conditioner will also help strengthen your strands so that they are able to withstand heat without damaging structure of your hair. 
    - Use a heat protectant at all times, as it helps to absorb heat from styling tools which protects your strands from heat damage.  
    - Clarify then moisturize. I recommend clarifying your hair at every wash because most of the styling aids geared towards "straight" hair contain silicones. Silicones aid in easing combability, and also help act as a protective coating over hair preventing reversion and heat damage. While they offer a plethora of benefits, there are also some drawbacks as well. - We now know that silicones are wonderful at coating the hair, however that protective coating can also block out moisture molecules from penetrating the protective barrier. A buildup of products containing silicone results in hair that is unable to receive moisture and other nutrients from your favorite styling products. - Some silicones are also non-soluble in water which means you are going to need a heavy duty shampoo [usually a chelating or clarifying shampoo] geared towards removing buildup.  I recommend using a clarifying shampoo to remove buildup, then following up with a moisturizing shampoo to replenish moisture and restore PH levels.  
    - Implement protein treatments every 6-8 weeks. This is very important as heat styling has the ability to break down the keratin bonds that fortify your hair making it strong. Protein treatments help restore strength, reducing your chances of breakage, split ends and damage from regular wear and tear on the hair. 
    - Alternate your wrapping patterns. If you have ever worn your hair "wrapped" for an extended period of time, you may have noticed a small amount of breakage or thinning on one side of your hair. I recommend alternating your wrapping methods, or utilizing the cross wrapping technique to prevent breakage and thinning.
    Follow MTM on Twitter | Add MTM on Bloglovin'Like MTM on Facebook 

    Tuesday, November 30, 2010

    All About Hair: Do You Experience Knots, Tangles & Matting When Wearing Your Hair "Out"? Try This Moisturizing Mist/Leave In Recipe!

    If you have extremely curly hair, chances are you have experienced those annoying little knots, balls, or tangles on the ends of your hair on about the second or third day of wearing your hair in natural, "free-flowing" styles [braid-outs, twist-outs, etc]. Not only can they be frustrating, but they can also cause additional tangles, knots and subsequent damage if those issues persist.

    Lately I have been experimenting with different moisturizing formulas because honestly I am always searching for the next best thing. The weather has been pretty frigid as of late, and as a result, my favorite products are not as moisturizing as they once were + my ends are starting to curl up on themselves which means it is time to up the moisturizing ante. I  picked up some of my favorite products and played kitchen chemist the past few weeks, and this simple recipe was definitely a winner: 

    Ingredients
    4 ounces of Suave Almond & Shea Butter Conditioner  [you can use your favorite condish]
    1 vial of Fermodyl 619 [formulated for kinky, coarse hair]
    2 teaspoons of Aloe Vera Juice 
    Enough water to make it a light, spray-able consistency

    Directions:
    • Add all ingredients to a spray bottle, and shake to mix well! 
    • Lightly spray on hair nightly and cover with a satin bonnet. This dual purpose spritz will help hydrate your hair during the harsh winter months; and eliminate the knotting dilemna's by lubricating your strands and keeping your cuticles flat which means little to no tangling and/or matting. This formula is light enough not to weigh your hair down, and is suitable for nightly use.
    Benefits:
    Ultra hydrating formula keeps your hair soft and shiny
    Lactic acid found in Fermodyl 619 minimizes tangles, matting and knots; making it more manageable
    Aloe Vera acts as a protective barrier against the harsh, cold weather 

    About this formulation:
    • Conditioner: Helps keep hair supple, cuticles flat, and hair ultra hydrated
    • Fermodyl 619: My Holy Grail in a vial; this product keeps those cuticles laying flat which means less frizz, less tangles, matting, knots and less fuss. 
    • Aloe Vera Juice: Aloe Juice makes an excellent additive as it nourishes your follicles, protects your hair, and offers a bit of hydration as well
    • Water: One of nature's best moisturizers; if you have hard water, opt for bottled distilled water. Alternatively, you can use Rose Water for a luxurious treat [I love the moisturizing effects of Rose Water].
    Follow MTM on Twitter | Add MTM on Bloglovin'Like MTM on Facebook 

    Friday, November 26, 2010

    Quicktip: Experiencing Breakage? Try Out These Super Herbs For A Natural Fix

     [source]

    When I first started my healthy hair journey, my hair was breaking like crazy. Every time I would comb, brush, or style my hair, there would be tiny little broken hairs on my shirt, bathroom counter, and floor. At that time I tried heavy protein treatments [which caused some shedding], as well as hair creams specifically formulated to control breakage [which resulted in dryness].  - A few months later I began to dabble in herbal remedies, and I was hooked on Herbal Rinsing! 

    Herb rinsing can be done by steeping herbs in hot water, letting the water cool, then pouring it over your head after rinsing out your conditioner. You can do herbal rinses to add shine, softness, nourishment, elasticity, and my favorite; to control breakage. Here's a list of my favorite [and extremely effective] herbs you can use for herb rinsing:

    Breakage                                                                                                                                                     
    Burdock Root: This herb is known to strengthen and repair hair while adding sheen, hydration & luster. Burdock Root is also effective in reversing hair loss, correcting scalp issues, and promoting hair growth in individuals with a short growth cycle. The mucilage in Burdock Root also helps add "slip" to your hair making the detangling process a lot easier.

    Rosemary: The nutrients found in Rosemary can strengthen your strands much like that of a protein treatment, minus the drying effects. Rosemary also imparts shine, body and softness. This super herb also helps to correct scalp issues like dandruff and psoriasis.

    Blue Malva: Is one of my favorite herbs to use for strengthening and repairing hair. Blue Malva is extremely effective in controlling breakage, and repairing chemically damaged hair.

    Hibiscus: Hibiscus strengthens hair from the papila root to the ends of the hair, and works to seal the cuticles stopping breakage in it's tracks. Hibiscus is also loaded with mucilage which means it is very effective as a detangling agent for highly textured curlies. This herbs also adds an incredible amount of softness and body to both relaxed and natural hair. **Hibiscus can stain clothes, so use caution when attempting a rinse with this herb**

    Shine + Softness + Body                                                                                                                            
    Horsetail: Horsetail contains high amounts of silica and cysteine which are both great at conditioning hair, whilst adding shine and body. The silica found in Horsetail also helps to strengthen the hair and improving the elasticity as well.

    Nettle: Nettle is rich in nourishing minerals that work to strengthen hair, add luster, and impart softness. This herb also stimulates circulation which in turns promotes hair growth.

    Coltsfoot: Coltsfoot contains an abundance of mucilage, minerals, silica, sulfur and plant proteins which all work together to help add sheen, body, repair the hair shaft, improve elasticity, and promote hair growth.

    Split Ends                                                                                                                                                   
    Burdock Root
    Horsetail
    Nettle
    Hibiscus

    Directions:
    - Add 1 cup of water to a small saucepan and bring to a boil 
    - Turn off heat and add 2 heaping teaspoons of your herbs to the water << For best results, use herbs that have been cut and sifted [these are usually labeled as C/S on packing and websites], as they contain more essential ingredients and are usually easier to use in comparison to powdered herbs. 
    - Cover saucepan and allow herbal infusion to steep for about 15-20 minutes
    - Remove the herbs, or strain through a fine sieve or cheesecloth
    - Let cool
    - Pour entire mixture over your hair after rinsing out conditioner
    - Do not rinse out, any smell from herbs should dissipate after about 20 minutes  

    How often should I do an herbal rinse?                                                                                                  
    For best results, use once weekly [or as often as you shampoo].

    Where to purchase herbs?                                                                                                                        
    You may purchase these herbs at your local Health Food Store, or online through the following reputable vendors:

    Follow MTM on Twitter | Add MTM on Bloglovin'Like MTM on Facebook 

    Wednesday, November 17, 2010

    Calling All Type 4 Curlies! Eliminate Matting & Tangles With Oil Rinsing!

    I am loving H&M's new ad campaign [source]

    If you have highly textured hair and you are looking for ways to help eliminate excess tangles and matting on wash day, try an oil rinse. Not only is oil rinsing great for cutting down [and in some cases eliminating] single strand knots, but it also helps replenish moisture lost from shampooing; leaving your hair soft, shiny and extremely manageable.

    Oil rinsing is a simple step you can add in between shampooing/conditioning, and it only adds about 5-10 additional minutes on to your hair regimen. - Here are some additional benefits of oil rinsing:
    • Helps hair retain more moisture
    • Eases the detangling process
    • Imparts mega shine
    • Helps prevent knotting, tangles, and matting
    To oil rinse, follow these simple steps: 
    • Shampoo your hair
    • Add about 1/4 cup of your favorite oil liberally throughout your hair
    • Leave in for about 2-3 minutes 
    • Rinse out thoroughly with warm water [don't use cool for this process, as the warm water ensures that all traces of oil are removed]
    • Condition hair as usual
    Rich Nourishing Oils To Use For Highly Textured Hair:
    • Coconut Oil: Softens the hair, delivers nutrients to the follicles, helps correct issues with dandruff and psoriasis
    • Extra Virgin Olive Oil: Ultra hydrating, this oil nourishes, softens and improves the elasticity of your hair
    • Brazil Nut Oil: One of my favorites of the bunch, this oil leaves your hair as soft as butter when used as a rinse, hot oil treatment, or even added to your favorite conditioner. - Brazil Nut oil softens, helps repair the hair shaft by delivering vital nutrients to the follicles, and helps control frizz.  
    • Castor Oil: Another extremely hydrating oil, it also helps remove impurities from your scalp and hair shaft. Castor Oil also nourishes your follicles promoting healthy hair growth.

    Follow MTM on Twitter | Add MTM on Bloglovin'Like MTM on Facebook 
    Related Posts with Thumbnails